


1. Overall length to width: 3.24 (A violin, for example is 2.86 roughly, making the viol longer and narrower)
2. Body length to neck length: 1.85 (violin is 1.63 or so, giving the viol a shorter neck)
3. Upper bout to lower bout (widths/diameters): 0.92 (violin about 0.80, so the bouts in the viol are much closer in size)
MY RECONSTRUCTION
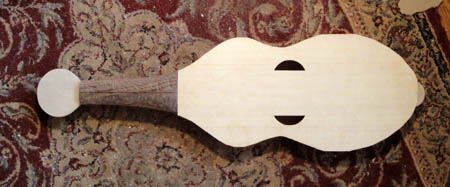
Given the full brunt of information above, I'm going to attempt to design a "typical" instrument. I've chosen to use a waist ornament, partially because it is more common, partially because I just like it. The bump is harder to cut than the point, but appears to be more common, so will use the bump. The pegbox will be a round disc. I've decided to use the sloping shoulder with demarcated neck joint style as a compromise of the various designs. I've also decided on the four soundholes design, though the specific shapes may change later on. I'm still torn between trying a footed bridge vs. a free-standing bridge, and will probably re-visit that issue later on when I get closer to having to make a decision. It doesn't affect the overall body design, however, so starting will the silouette form below:

The body and neck will be cut and shaped from a single block of wood, as was common in the medieval period. The bodies in the sculpture didn't look overwhelmingly deep, so I'm going to probably use only a 3" thick block. There was no fingerboard, and no break shown where a fingerboard would start/stop in any of the examples. This presents two possibilities. First would be that the instrument was hollowed from behind, with a backboard set on it. This would create no lines on the front where a soundboard would end and a fingerboard begin. However, only harps were known to have been constructed in this manner - all other stringed instruments are a hollowed box with a soundboard added as the belly, so that seems very unlikely. The other possibility is that the top-piece of wood went the entire length of the body, from the pegbox to the endnub. While this is supported by the visual evidence, has the structural oddity that you are then using a softwood as a fingerboard. Might be justified especially if the body is hollowed out almost the entire length of the neck, as in the rebec, but not quite sure on that one. Might be that the soundboard is attached, but there is no fingerboard section of it. That is, the soundboard doesn't run up past the start of the neck, with the "fingerboard" area being the hardwood of the neck itself. This would require the soundboard be inset a bit to have the soundboard flush with the neck fingerboard space, as is the case on lutes, for example. It requires a little more thought for the moment. But doesn't affect the carving of the primary block initially, so we have now to acquire the block to carve.

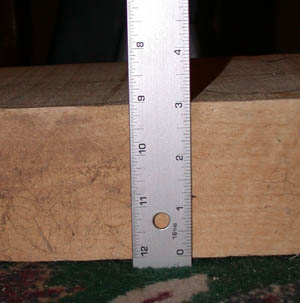
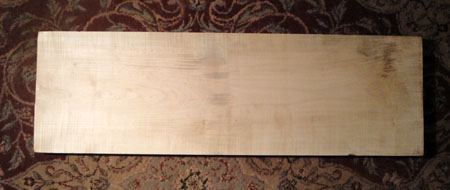
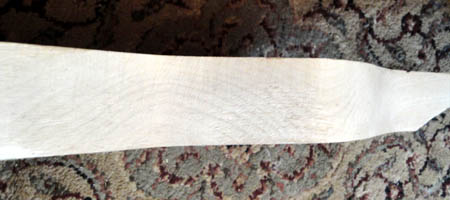
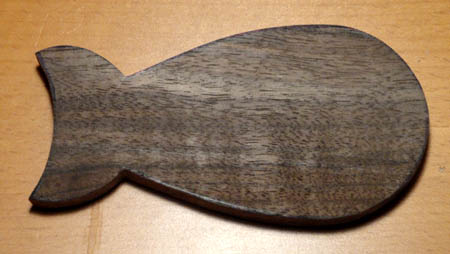
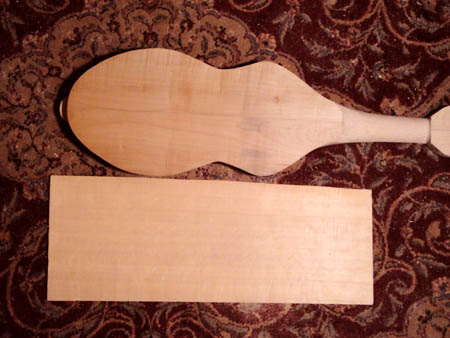
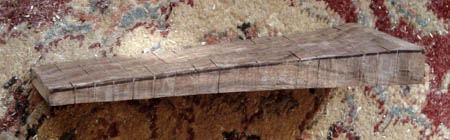
This is the starting block. It is about 10 inches wide, 46 inches long and about three inches thick of hard (eastern big-leaf) maple. There doesn't appear to be a lot of flame in it, but that is okay, as ultimately it will make the cutting and chiseling much easier to do. The piece was acquired from a local wood store that has some wonderful pieces of hardwood, and it weighs about 30 lbs. at the moment. There were two large knots on it, so I ended up chiseling out the smaller one a bit to make sure that it didn't go through too deeply, and it didn't. The side visible here will ultimately be the back.
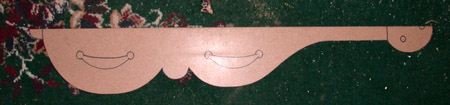
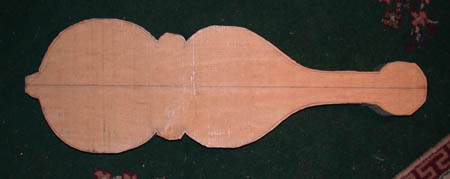
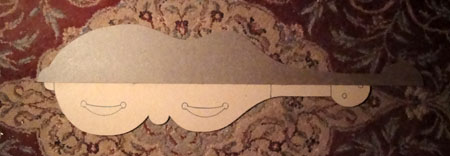
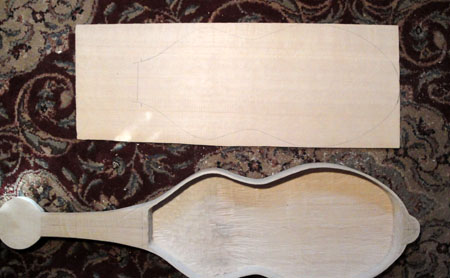
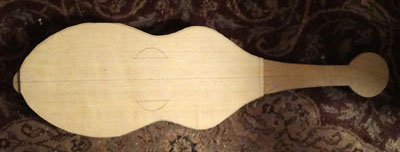
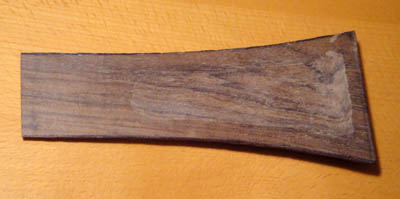
First thing out was to create a template that would serve to draw out the instrument on the block. As the block is so thick, there was a danger in hand-sawing of skewing the cuts, so I needed to draw the outline on both front and back, and have them line up very carefully together. To do that, and to make sure that the instrument was actually symetrical, I did this half-plan in masonite. It will also be used to mark out the soundboard piece.
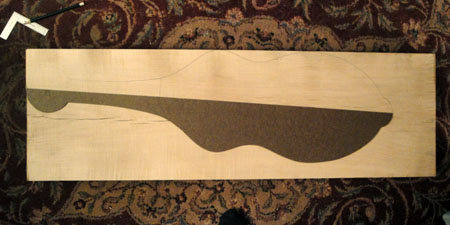
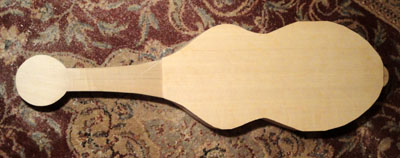
The template was used to mark out the instrument on the cleanest section of the block. I then started to do a test cut with my big saw. I discovered that, even with the new big saw, the rate of cut was about 3 inches an hour. Since I had over 100 inches of cutting to do, I kinda despaired on that, as my arm really wasn't up to doing 30 or 40 hours of cutting. To the rescue came Ken Landis, one of the Rotarians in our Camden Club, who has a full woodshop of power tools. He mostly does wood-turning and some cabinet work, and made the generous offer to use his large bandsaw to chop out the block for me.
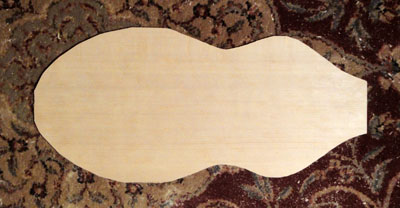
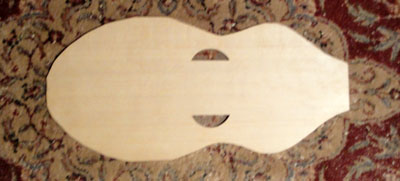
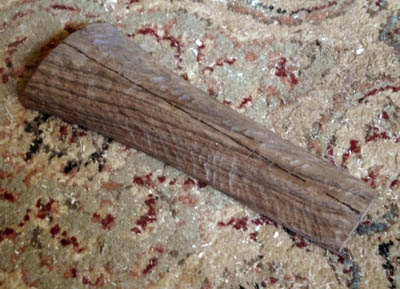
A lesson in how power tools make things much faster. Ken was able to cut out the block rather closely with the bandsaw in about an hour. So here is the block pretty much to shape, requiring only cleanup rather than reshaping at this point. Ken then asked what my next step was in the process, at which point I noted that is was hollowing out the block, and I described my normal technique of drilling coupled with the scoop chisel. He proffered a better solution, and to the drill press we went.
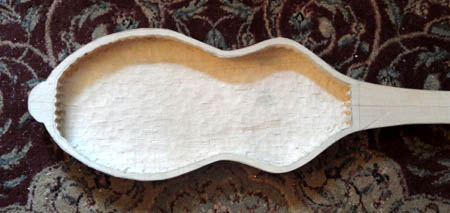
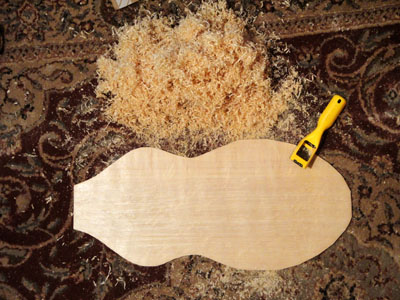
Another hour with the drill press and some huge 2" boring bits and the grand majority of the hollowing was done. Functionally in one morning the power tools were able to credit an "instrument blank" that would have taken me at least 100 hours of manual work. So I consider myself seriously ahead of the game on this one. For his efforts, I gave Ken the remaining bits of wood, including the large endblock which he will probably turn into (pardoning the pun) a nice big bowl.
Still, even with the gross work done, there is a lot of work still to be done. The boring bits had a starter tip that meant that the last half-inch or so couldn't be drilled into, so at least anothe 1/2 inch of wood has to come off the bottom. The walls are about 1/2 inch or more thick, to allow for a considerable margin of error with the drills (even as it was, there was a single "skip" that is visible in the shoulder on the far side of this view). A lot of chisel work at this point. But I'll probably first cut the neck and head down in thickness to that shaping them is easier (only working with half the thickness of the wood), and then tackle the main block. I also have a new tool on the way - an Arbortech Power Chisel, which might make the whole process easier - we'll see.
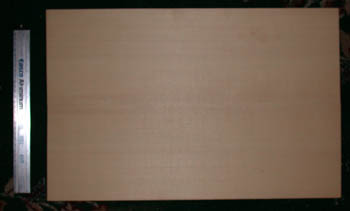
In the meanwhile, I've acquired the soundboard piece from Luthier's Merchantile Inc. It's a full jumbo sized guitar soundboard, and has been edge-glued together and thinned down. The broadest single piece is only 8 inches, so to handle the 10 inch width of this instrument, I needed a joined piece. It is flat rather than arched as I believe the instruments at this time would have had a flat soundboard rather than an arched one. Presently it's about 14 inches wide, which should easily handle the size.
Next up - thinning down the neck/head and tailknob.
GERMAN BIBLE VERSION
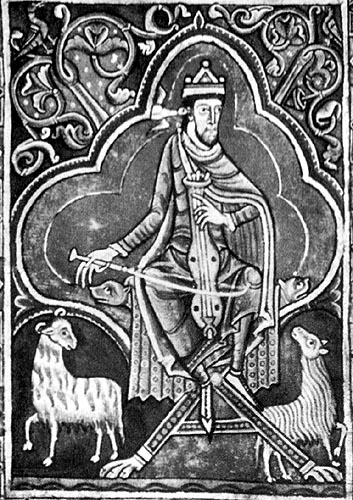
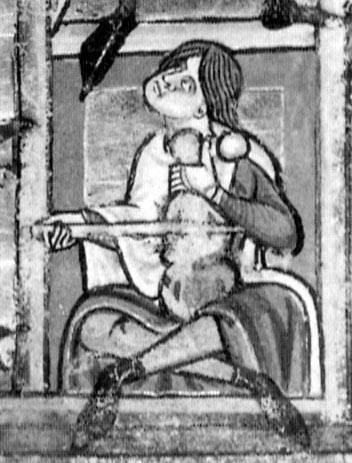
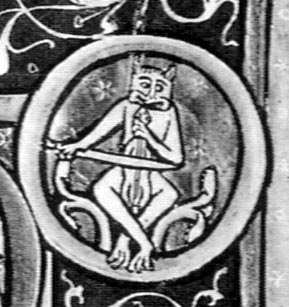
While the first one is still being worked on (having been interupted by other instruments), an Italian gentleman wanted a version of this instrument based off of a German model. The best German illustration is from the 12th Century Bible above, the MS Harley 2804 presently in the British Museum. A better, color version of this is below:

This one shows a three string, soft waisted instrument, pretty large, with defined tailpiece, and very clean footed and flat bridge. There is no defined fingerboard. From that illustration, I drew up these plans:

(You can right click on the plan to make it larger if you want to see the details better). These plans generate an instrument 37 inches long, with a string sounding length of 24 inches. The widest bout would be 11 wide. That breadth means I will need braces - I've tentatively sketched in six, but that may be reduced to four depending on the individual strength of the piece I get for the soundboard. The soundboard will be slightly recessed into the body, and the fingerboard will just be the block of the neck. The grid is one square equals one inch, except the bridge, which is one square equals one quarter inch.
Decided on using wood that would be found in central Europe, so basically maple/sycamore for the body block, German spruce for the soundboard, and walnut for the tailpiece and pegs. So with a plan in hand, off to get wood!
The block of wood from Superior Maple Products - a very nice 10/4 piece of tiger maple. It's pretty huge (42x13 inches), and weighs in at 33 lbs. The grain on it kind of is Y-shaped, so the instrument will probably be laid slightly off-axis.
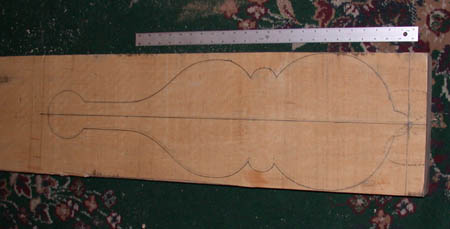
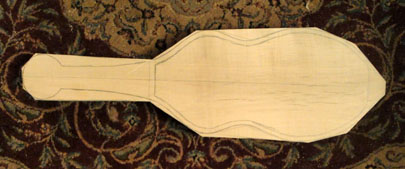
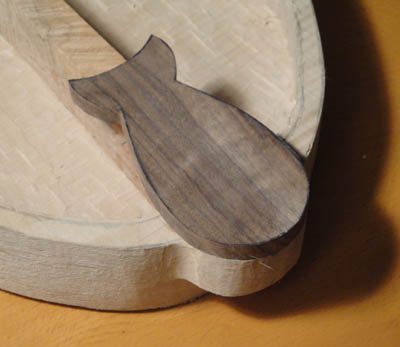
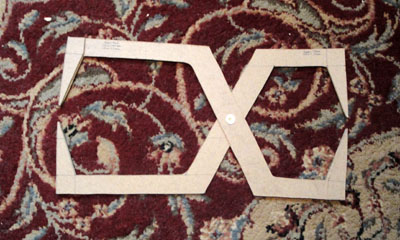
The template for the instrument is cut from masonite. Here is placed next to the other viol template - this one is longer and a bit skinnier than the other one.
Lining up and tracing the design on the block.
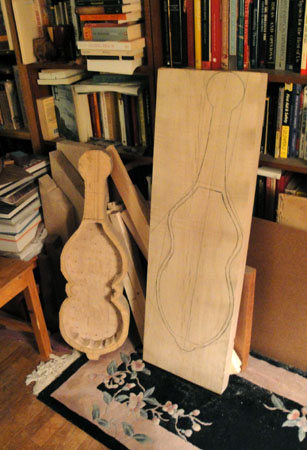
Where the wood gets stored in my house (the living room). The block waiting to be cut next to the other instrument block (waiting to be finished...) and all the scrap pieces.
A couple of hours of sawing (I love my Japanese saws - they are SO much easier to use on these hardwood blocks) and we have the block basically cut out. There is a little surface splitting here, but since that area is going to be hollowed out anyway it doesn't really matter.
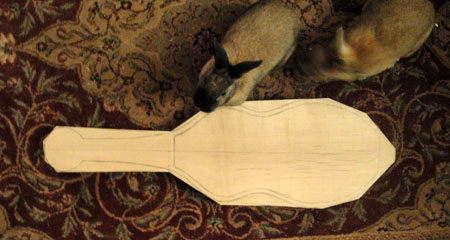
Because, of course, the bunnies always have to help...
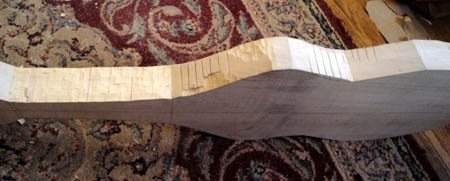
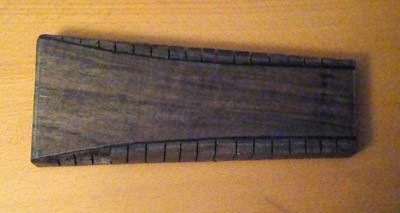
The "waist" is sawn out in a shallow V to finish the rough outline. However, the saw can only make straight lines, and the body is actually curved. So I resort to the "comb" method of sawing lots of little cuts to the proper depths and then chiseling out the comb teeth. This is a fairly efficient way to remove the outline material, and prevent from unexpectedly splitting the wood. Thus proceeding, the neck, waist, and tail areas are shaped.
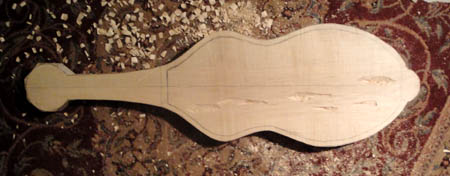
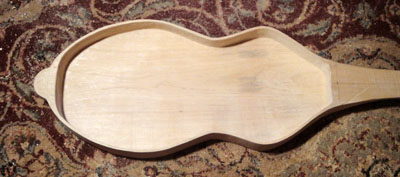
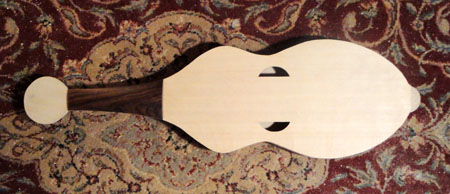
The more or less final outline of the block. I've also gone around it with the plane/scraper to smooth it down a bit. Final edging shaping will be done with files.
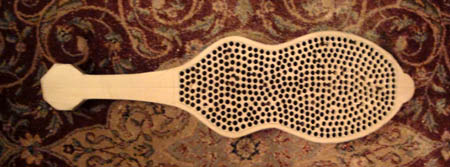
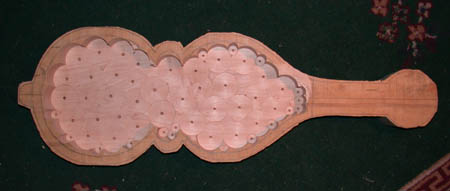
Next, I drill the holes to start the hollowing of the body. This proved difficult on two points. First, this is definitely the largest block I've worked with, and that meant a LOT of holes. Secondly, the block is quite deep comparably, and the wood very hard. My hand drill would be able to cut about 30 or so holes and then it was seriously over-heating. It took about three hours for the drill to cool down, so it wasn't possible to do more than one or two drill sets in a day. This means it took a while. And yes, I had to count. I come up with 491 holes.
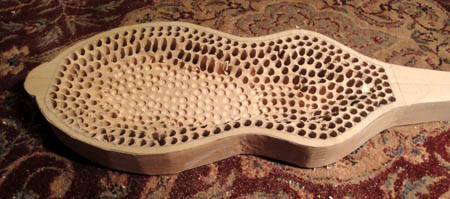
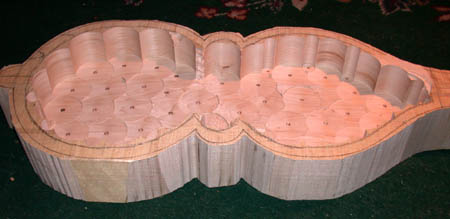
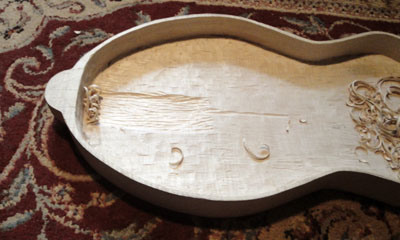
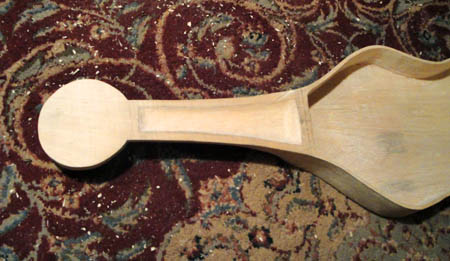
Having finished drilling the holes, I now start chiseling out the body cavity. I start by basically just cutting down to the "floor" of the hollowed space, and then working my way out to the walls. Here the floor has been reached and spread out a bit in the lower bout.
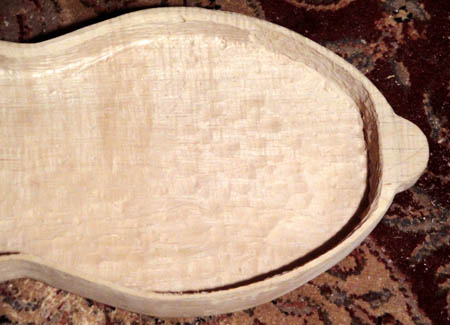
The upper bout has been cleared to the walls and down to the floor. The lower bout is still being worked.
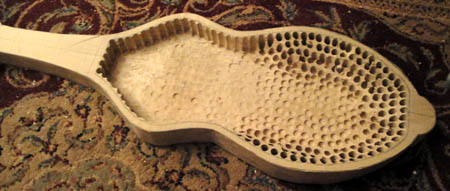
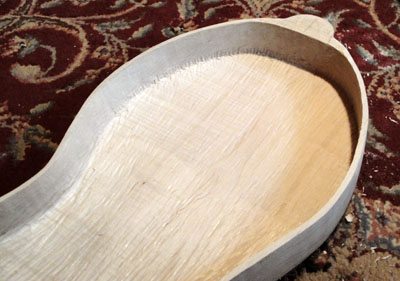
The basic chopping out of the body cavity is finished. From this point on the carving down is done a little more finely.
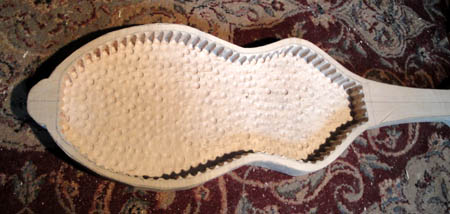
The next carving down of the walls and floor removes the wood as far down as the evidence of the drilling. This leaves the walls and floor about 1/2 inch thick. Before I can thin the walls out further I need to have the outside shape of the walls cleanly done so I can know how far I can work outward.
The outer walls are scraped and filed down to the final outline shape, and clean enough that all that really has to be done further is final sanding. That now allows me to thin out the walls from the inside.

In continuing the shape the block, next I start forming the neck. The basic area to be cut out is drawn onto the block.
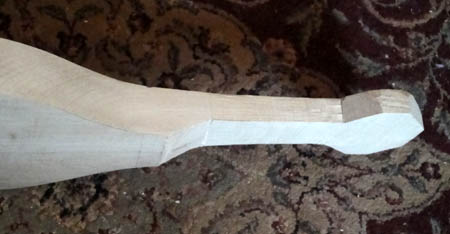
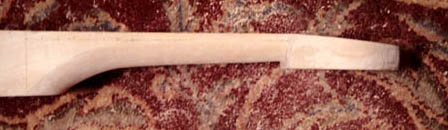
A long while with the saw and the neck has been roughed out. The neck itself will be carved down a bit and rounded off. The head will be shaved down so that it tilts back.
At the other end of hte block, the tail stub is cut down roughly into shape so that it is about 1/2 the thickness of the body.
With the body block basically shaped now, there are a few reworking of the of the design. The person who wants the instrument wanted to add a fingerboard to the original version. He also wanted a curved bridge to be able to bow individual strings. So a few changes were made to the original plans.
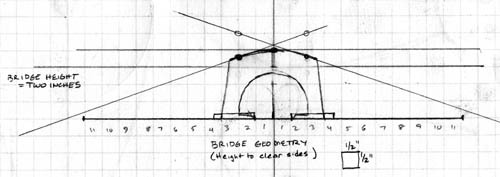
The first problem is to figure out the bridge height and bowing angles to allow the strings to be individually bowed and still have the bow clear the sides of the instrument. That results in a bridge height of two inches or so.
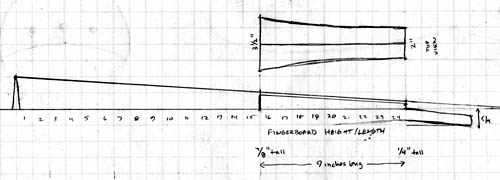
With the bridge height determined, the angle of the fingerboard is able to figured out. That generates dementions to cut a piece.
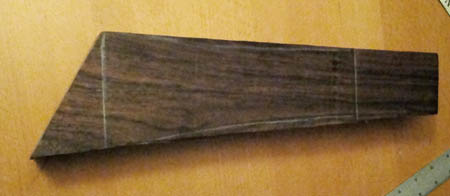
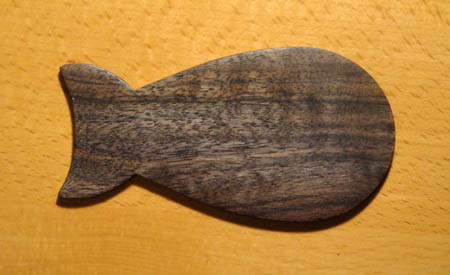
The fingerboard and tailpiece will be made from walnut (left over from the Utrecht citole). This piece was sufficiently large for the fingerboard (though a little over twice as thick as necessary). The design is pencilled in (and traced with white pencil to be seen a bit easier on the dark wood) to follow the grain line of the wood fairly cleanly. This both makes it a bit stronger and adds to the asthetics.

The piece is roughly cut out, and cut lengthwise in half. It'll be carved down once the neck is fully shaped.
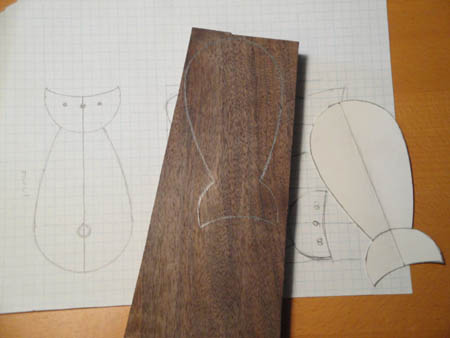
After the fingerboard, I turn to the tailpiece. That is cut from the "other half" of the fingerboard piece. Again, it is drawn onto the block (based on the 1/1 scale drawing shown here to the left) running along the grain again.
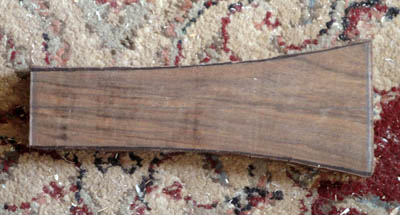
The tailpiece has been cut out, and shaped to final outline with dremel and files.
The tailpiece is used to shape down the tailstub on the body block so that they line up smoothly (the olivewood rod is just to hold up the tailpiece for the picture).

Next on the main block is to thin the walls down. They start off at about 3/8-1/2 inch thick, and the idea is to get them down to about 1/8 inch thick. Using chisels I start carving down the side walls.
The top edge is thicknessed all around to about 1/8 inch, and then the walls are carved following around the curve (see the upper right corner). This is a very slow process, but progress is ongoing.
Just to give an idea of how much larger this instrument than others I've made. Here is citole 2, which actually fits entirely inside the cavity of this block. It means everything takes a lot longer than with the other pieces.
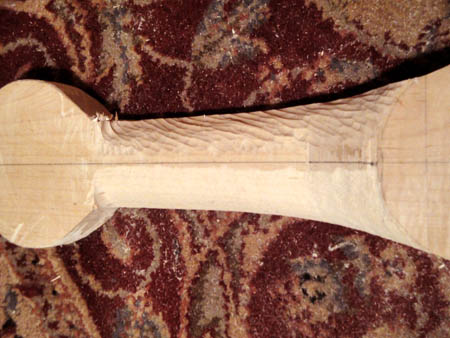
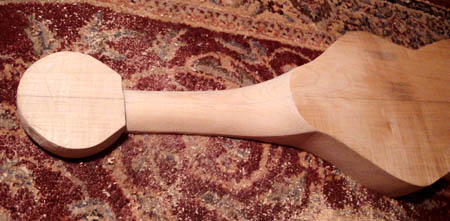
Next up is to shape the neck. First I mark the centerline. The neck is then roughed out with the chisels and then run over with the dremel and files to get a basic rounded neck.
Having done a rough rounding, next I delineate the actual clean final lines. Those are penciled on both sides The neck is also thinned to a distal taper as well as a curve for the "heel" of the neck, where it joins the body.
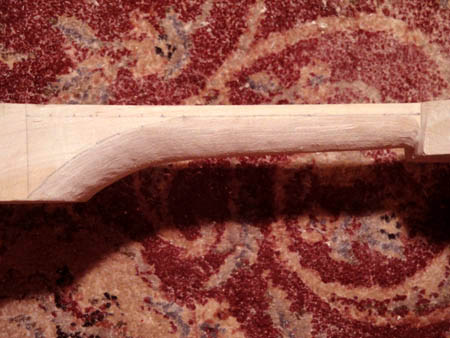
The neck is cleaned up to the lines of the basic shape with a combination of chisels, dremel and files. The distal taper is also evident from this angle.

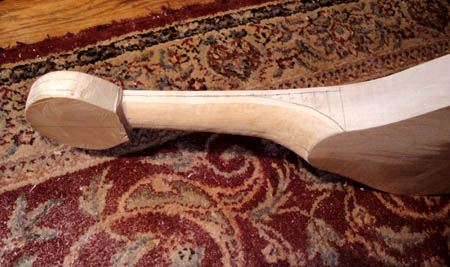
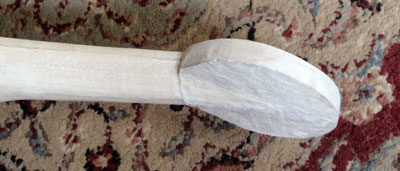
The headpiece is next up. The head will be angled back, carved down into a tilted wedge. First I mark where the end of the head will be.
The top of the head is then carved down with chisels to get the rough right angle. That is then smoothed down with a combination of scrapers and files.
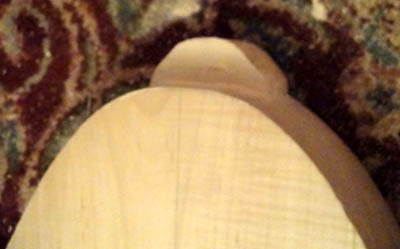
The neck is cleaned up with files t obe smooth and following the accurate lines. You can also see the slope of the top of the peghead here.
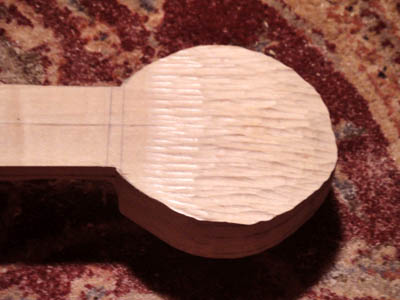
The underside of the peghead is then carved down until the disk is about 5/8 inch thick using a combination of chisels, the planing tools, and a little dremel work.
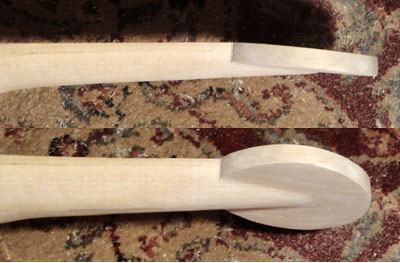
The peghead underside finished, including cleaning up the joint with the neck. All that's left there now is to drill the peg holes, which will be done later when I have the pegs.
In the meanwhile, I'm starting to also prep the soundboard pieces. The soundboard itself will need bracing. This piece of violin spruce (normally used to make the internal violin bracing blocks) I'm going to cut down into a series a strips to use as crossbraces for the soundboard. The cutting lines have been sketched onto the wood.
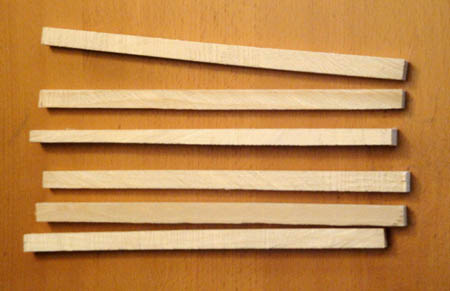
The strips have been cut. Each is about 1/2x1/2 by about 11 inches long. They'll be carved down into T-beams once I have the soundboard piece.
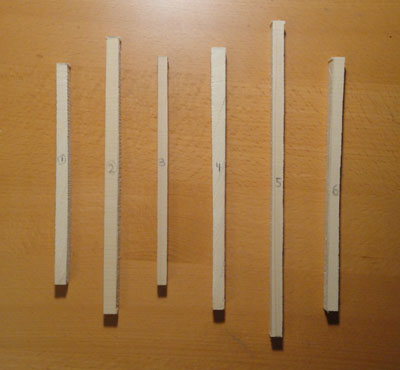
The strips are then cut to length and numbered so I can keep track of where each one will go when attached to the bottom of the soundboard.
Finishing the braces, a convenient image series of the steps. Starting off with the strip cut to length, the strip is shaved down to the fixed height and thinned to width. A centerline is marked for the top, and then the strip is carved down into a wedge. The sides of the wedge are then carved inward into a concave curve, and then whole thing filed smooth. Cleaning up the ends of each brace will be done just before they are fitted to the soundboard itself.
Having finished thinning the walls all around, I need to start lowing the floor of the body block so that the back plate is reduced to its final thickness. It starts off pretty thick - over a half inch, and needs to be reduced down to about 1/8 inch thick. I start working it down with the chisels.
The difficulty of working the back plate is that is it difficult to determine the thickness. With the walls I can just eyeball it if necessary, or use a small caliper. The problem with the backplate is that because the walls are in place, you can't see it on edge. Likewise you can't get a normal caliper over the sidewalls. So I made a caliper out of masonite with enough throat depth to reach into the center of the body block to give me clean measurements. Tests on it make it accurate to about a millimeter, so I'm pretty confident with it.
The floor is chiseled down until the back plate is about the right thickness. The corners where the walls meet the floor need to be cleaned up, but here it lets you see how much material was removed.
The floor is then leveled with a combination of planes and files, and the joint between the wall and floor chipped out cleanly with chisels. The body cavity is now done (the grey area is just a mineral tone in the wood).
The soundboard itself is a little bit of a problem. The piece for it needs to be 11 inches wide and 23 1/2 inches long. Guitar soundboards, even jumbo/dreadnaught boards, are normally only about 22-23 inches long, and at most 9 inches wide. Unfortunately, even a joined board (which would be wide enough) isn't quite long enough. Fortunately, I was able to find a "double instrument" board that is about 12 inches wide and about 24 inches long, which will allow me to have a one-piece soundboard.
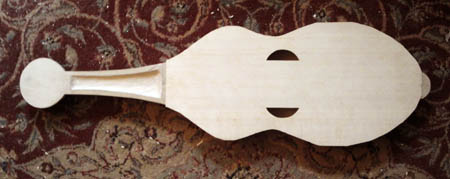
The walls of the body block have been finished and leveled very carefully, I fitted the soundboard to the block and traced the shape onto the soundboard. It is a very tight fit, but it does fit.
The soundboard is then rough-cut from the board into about the right shape, and the top side smooothed down level.
The top being clean, I then thin the board down from the underside using the planing tool. The board starts off just about 1/4 inch thick, and is thinned to about half of that and leveled smooth.
One of the "tricks" of the historical makers was to have the soundboard not an even thickness, but an even density. The way this was determined was to hold up the soundboard to a strong light and see where the light did not come through evenly and thin those spots until it did. Here, for example, you can see the top central area of the illuminated space needs to be thinned down just a little more as there is more shadow there. It's a slow process, but it does make for a better board.
Refitting the soundboard to the block and trimming excess, also making sure the fit is clean all around the edge. I also mark the centerlines in relation to the body block for placement of the piece again, and to line up the soundholes.
Working now on the back of the board, I mark where the actual joint with the fingerboard will be, and draw in the soundholes from a cardboard template so that they are spaced evenly and are the same size.
The soundholes are then cut out from the board using a finger drill for an initial hole, then using a jewelers saw to cut them open, and finishing up with some sharp knives and files to clean the edges of the holes. The board is now ready for the braces.
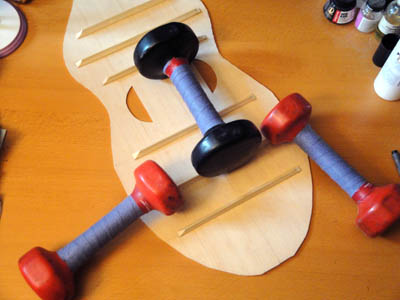
The soundboard being finished, it is time to attach the braces. The ends of the braces are checked against the size of the main block (so they don't touch the sidewalls), and then are tapered at the tip. Each one is then glued down into place with handweights as clamps.

The braces all in place, the soundboard is ready now to be fitted to the block. The end of the soundboard where it butts against the fingerboard is also cleaned up and straightened.
Back to the fingerboard now. The roughcut block of claro walnut for the fingerboard is figured against the final neck shape of the body block. I use my normal tooth method of chipping out the curve of the neck.
The fingerboard block is now accurate from top view, with the sides roughly cleaned up.
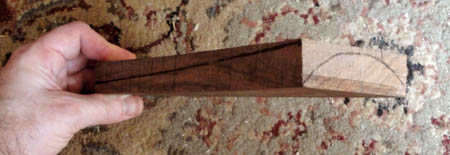
On that piece, I mark the distal taper of the board, and on the end mark the curve that it will eventually follow.
Again using the tooth method, I chisel down the board to a wedge shape (from side view). That gets it roughly now into the top and side view shapes accurately. The top is then leveled only in the centerline, and the centerline marked.
Next with the chisels I whittle down the top of the board into a curve, trying to keep it even on both sides as I go down. This is achieved mostly by sighting down the fingerboard and visually noting where there are differences. I also run my fingers down the piece to feel for bumps or irregularities.
The last carving bit is to hollow out the underside a bit. This lightens the piece and creates less contact with the body block so it can be more easily removed should that become necessary.
The shaped fingerboard and soundboard are then matched up onto the body block for any fitting adjustments and to make sure all the edges line up cleanly.

Satisfied with the shape and lines, I use the files to smooth down the fingerboard, and sandpaper to functionally glass it. The piece is given a light coat of fingerboard oil and is functionally done. The grain of the wood comes out very nicely, though the tiger striping is less pronounced than I thought it would be.
Back to the body block, the neck under the fingerboard is hollowed out similarly to the fingerboard itself, again mostly to lighten it and to provide a smaller contact surface if removal proves necessary.
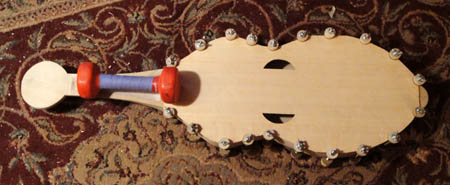
The pieces now all finished, I start actual assembly. I have a bunch of violin spool clamps that I got to do the citoles. However, they proved just a bit too short (meant for total height of about 2 inches and I needed a bit more), so I reworked the clamps so that they can handle a larger opening (up to 3 inches). That will prove useful for other instruments as well. Using the spool clamps to hold it in place, the soundboard is glued to the block. The handweight clamps the one small area where the spool clamps won't reach.
The soundboard glued in place. Next the fingerboard is glued into place.
The fingerboard is then clamped and glued into place. After that is dry, the edges all around are cleaned up. The body piece is now ready to be finished, with only the holes for the pegs left to be drilled.
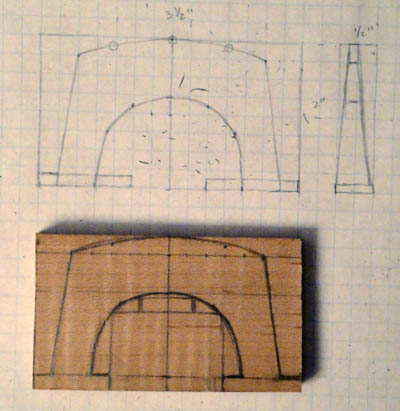
With the body basically done, it is time to do the fittings (tailpiece, bridge, nut, and pegs). This is the design for the bridge. I select a 1/2 inch thick block of maple to do the bridge and sketch it on from the plans. The inserted rectangles below the arch of the bridge are sawing guidelines.
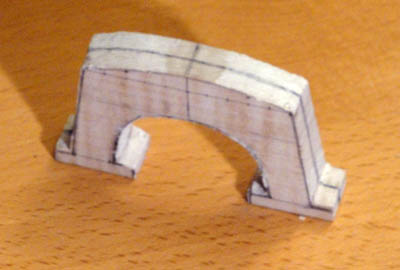
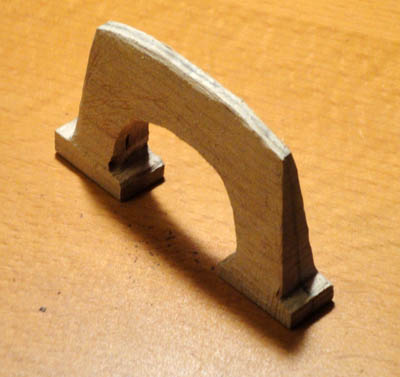
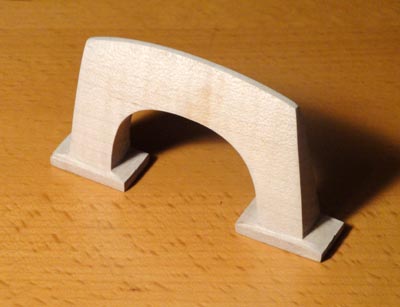
Working out the bridge. First, the block is rough cut out. The top edge is now marked so that I can taper the sides appropriately. Next the sides are tapered and the feet shaped a bit. Once I'm happy with the basic shape, the whole is then sanded and cleaned up. The rest of the fine tuning on it will be done when the instrument strung.

The tailpiece is thinned down to just under a 1/4 inch thick, and then fully cleaned up, sanded and oiled. It now just needs to have the holes for the tailpeg and strings drilled.
The instrument as it stands. Now just need to do the pegs.
The pegs are cut from the same piece of wood as the fingerboard and tailpiece. First I design a basic peg (the white template to the left). Three of those will be necesary, so three blocks are cut which will be turned on the mini-lathe. The last piece is for the tailpeg, that will be thrust through the tailpiece into the tailbump on the body block. It will have a carved head of a little face.
The peg shafts are turned on the mini-lathe, and then are cut out from the block with a saw, which results in little mallets. The heads are then flattened to the thickness of the top of the shaft, and the shape drawn onto them. They are then cut down to that shape, and given a distal taper so that the top of the peghead is thinner than the base. Finally the pegs are run through the peg shaver to taper them for insertion into the instrument peghead. The three pegs are shown more or less finished here. The tailpeg still has it's "mallet" head, as that is going to be carved into a face. The other little strip of wood is cut-off to be used for the nut at the end of the fingerboard.
Back to the body to start placing the pegs. The tailpiece is a little complicated. The soft soundwood board is higher than the tailnub, so the tailpiece would cut into it if just directly mounted onto the nub. I add a hardwood plate (here another cutoff of the walnut) to cover the top of the nub and to sit a hair higher than the soundboard at the soundboard edge. This is glued and clamped into place.
The little tail plate in place and filed flush to the nub. It will be tapered backwards to allow for the tailpiece to angle upwards toward the bridge.
I'm now ready to insert the pegs. Starting with the tailpeg, I drill a pilot hole through the top-plate and nub, and then using the peg reamer straighten it out and widen it to the max thickness of the peg reamer. It's a slow process to bore through that much hardwood, especially without doing any damage.
The peg is then fitted to the hole. As you can see, it's riding too high. So we have to shave down the peg a bit.
The tailpeg in the peg shaver. This is a back and forth process to shave just a hair, retest, shave a hair, retest, continue ad nauseum until the peg is sitting at the desired height.
The tailpeg (with the tailpiece) fitted to the desired height. The head can be carved now.
At the other end of the instrument, the three pegs are fitted to the peghead. I first mark where the holes will be drilled.
Pilot holes (smaller than the narrowest part of the peg) are drilled then with a hand drill (sadly I don't have a press). Once again the reamer is used to widen and straighten out the holes. The pegs are then fitted, shaved, fitted, shaved, etc. until they are sitting where I want them.
The pegs are now in place on the head. The stems will be trimmed down once I've done the set-up when I have the strings. They are a little high now. I also take this opportunity to shape the nut. It also is set way too high, but that allows me some play with I do the setup with the strings.
All the parts together. The tailpeg head has to be carved still, but otherwise all that's left is lots of sanding and the finish. Then I string her up and we see what kind of instrument we get!
Lots and lots of sanding. Since this instrument is only going to be oiled rather than lacquered, the entire thing is functionally glassed (meaning sanded down to about 600 grit). The grey "stains" on the back are mineral inclusions in the wood, and are just part of the color of the wood. This took a while.
After all the sanding is done, the instrument body is then treated in a mixture of mineral oil and beeswax. This is rubbed into the the wood until it is as saturated as possible. That is let dry and air, and then the process is repeated twice more until the wood will accept no more. It then feels like simply polished wood, but is sealed against moisture. The "flame" in the wood also now stands out considerably more, as can be seen from this angle on the fingerboard.
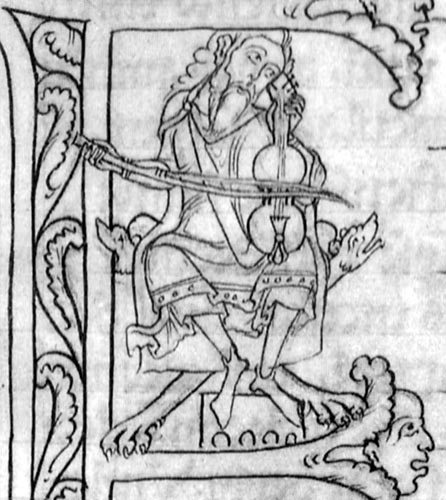
The body block functionally done completely now, the last little bit of actual carving is the endpin. This is the peg that thrusts downward through the tailpiece into the tailnub on the body, holding the tailpiece in place. This particular instrument has very few decorative elements, so this is the only real chance for decoration on it. The tailpeg is braced in a large wooden clamp to hold it while I carve it. The idea is to carve it like a small wisened man, sort of like Odin. The face is based on a German carving from the 12th century. The pattern is first drawn onto the end of the peg (which is about 3/4 of an inch across) and the peg carved down to that outline. Then using the mini and micro chisels, the features of the face are carved out very carefully. The eyes are drilled out with the finger drills. When the carving is finished, the whole is filed down with the mini files to clean it up, and given a treatment of oil that darkens it. The last image shows it against the tailpiece. The carving is relatively shallow, but looks rather neat I think.
All the pieces now basically done, I drill the holes in the tailpiece and the pegs to receive the strings. Using my eternal roll of black nylon cord, I string it up to set the spacing and to start setting the action. I discover that the angle between the nut and the pegs is pretty hard, so that initially the strings kept popping out of the groove being pulled outward. I reshaped the grooves to angle outward in a gentle curve, kind of like a peace sign, and that solved the problem. With the action set reasonably, it was time to add in the frets.
The frets are tied on gut. Using a fret calculator for distance (the soundlength was 24.5 inches) I tied on the frets from ends of gut strings I had on hand. The original intention had been to try to get six frets on the fingerboard, but the curve of the neck meant that the sixth fret kept sliding back, even when I put a small notch in the fingerboard. I finally tried a bigger notch to hold it, but that simply cut the string. Since I didn't want that to happen repeatedly, I figured it was better to just leave it at the five frets. The fret knots have the string ends burned to keep them from coming undone.
After doing that setup, the moment of truth. I replace the nylon chord with the actual gut strings. The gut is obtained from Gamut Strings, where I get most of my strings. The tuning here is, low to high, G' (1.5 octaves below middle C), D (octave below C), and G (below C, or the low string of a violin). That places the instrument between a cello and a viola in pitch range. The strings are 1.74mm, 1.28mm, and .96mm respectively. I put on the strings and then adjust the action to where it want it by carefully filing down the nut.
The initial sound is a little thinner than desired. The plucked sound is very rich (bass citole! I am eventually going to have to make one of those - it just sounds too cool), telling me that the box is good. The bowed sound is a little thinner by comparison, which implies the bridge is not as good. So I thin down the bridge considerably, and do a little reshaping on it. After some back and forth doing that, the bowed sound approaches the plucked sound, and voila, it is finished!
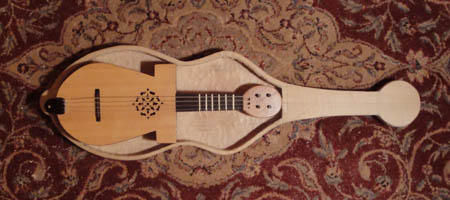
The finished instrument. Top picture is the angled view. Second picture is the top, side, and bottom views. The flaming of the wood doesn't show up quiet as well in the pictures as it does in the wood, but you can see the "bear claw" pattern in the spruce top. Third image shows the pegs and frets. And the last image shows the little Odin guy. The sound is rich and vibrant, even without a soundpost. It's also really rich being strummed, which makes me think I should try to make a citole at this scale at some point (sounds like an oud that way).
To get an idea of scale - this is the viol next to my standard sized violin. It's about as big as a tenor baroque viol. Just a hair too large to play braccio style, even for me with my monkey arms.
THE VIOL BOW:
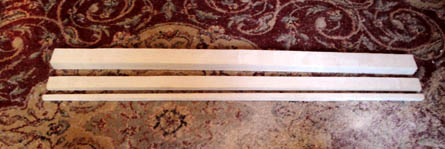
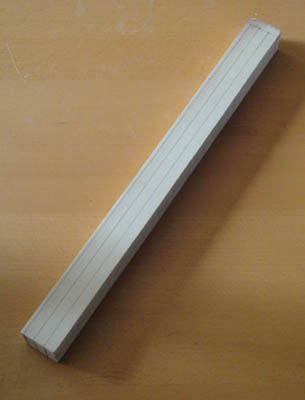
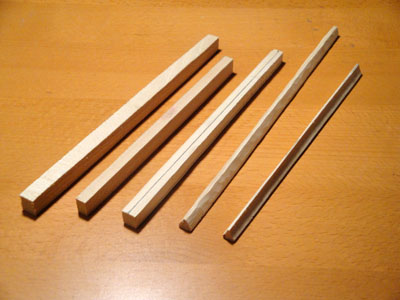
In addition to the instrument itself, I've also decided to try my hand at bowmaking. Here I have acquired a 2"x2"x38" piece of very straight grained maple. A 1/2 inch thick slab is then cut from that, and then a 1/2 thick stick is cut of the slab, leaving me with a 1/2" x 1/2" by about presently 38". This will then be rounded off into a long slender stick. The stick even before rounding is pretty flexible.

The stick is then rounded off and tapered very slightly so that the tip is smaller than the handle.
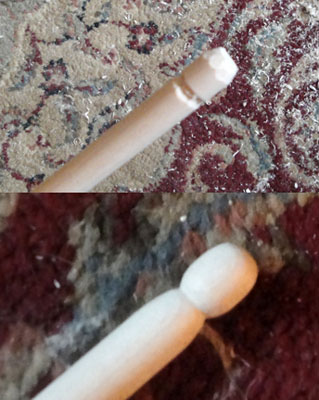
I carve a ball end at the handle.
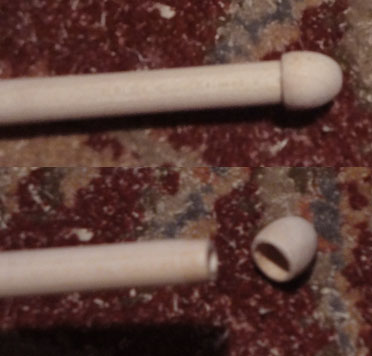
At the tip is a hollow with a little wooden cap. The idea will be to wedge the hair into the hollow, and then cap off the hole and wedge.
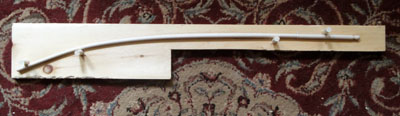
To work with the bow under tension, and also to bend it to shape, I built a bow jig. Here is the bow in the jig as I bend it.
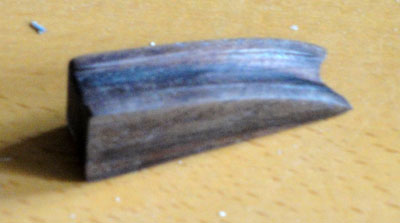
A little scrap of the walnut from the fingerboard and tailpiece is carved into a frog for the bow. It will just be slipped into the bowstick where the hair is fit through the stick.
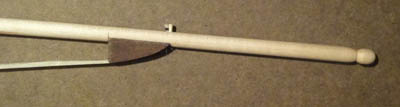
Hairing the bow: using a shock of violin bow hair (Mongolian white unbleached), each end gathered and tied using black thread while under a small amount of tension. That bundled piece is then used to hair the bow. The first step was to take one end and push it through the drilled hole by the handle. That was "pinned" into place with a small tapered wooden pin that had a channel cut into it. The pin was tapped into place and held the hair in place using just friction/tension. It holds very well. You can see the frog also here in place.
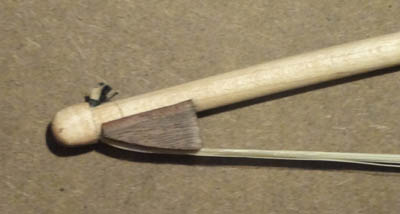
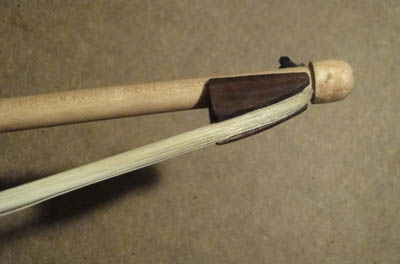
The other end proved considerably more tricky. My initial idea had been to stuff the other end of the tied bundle into the hollowed end at the tip of the bow, and simply cap it in place. The cap was held on by simple tension. Of course as soon as I tried to allow the cap to hold the bow pressure, it popped off the cap and hair came loose. I tried pinning the hair into the hollow and capping it. That broke the cap in half as it came loose. I then decided to resort to the same solution as at the handle end. I cut a slot in the tip of the bow, slid the end of the hair into that, and then capped it holding it in place. That version held, and is here pictured (along with the little tip frog, which is there mostly to flatten out the hairs).
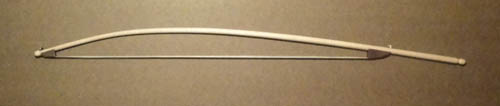
And thus we have the completed bow (oiled).
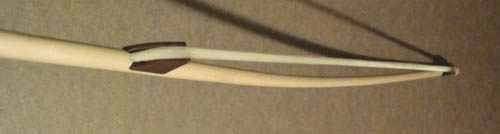
Showing the underside, so you can see how the two frogs act as a channel to guide the hair flat.

The bow hair length is about the same as a violin bow (shown here is my standard 4/4 violin bow). The overhanging handle makes it longer though. It is also a bit lighter than my bow - maybe 50g?
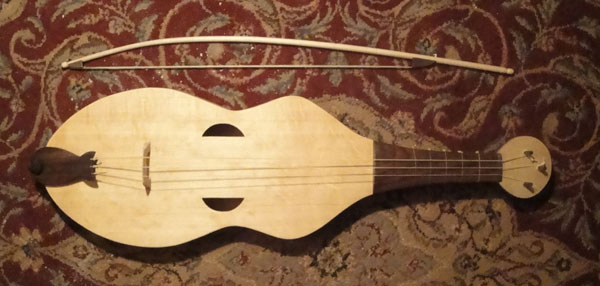
The complete package - bow and viol. The bow is almost as long as the viol, but not quite. After a LOT of rosining, it's ready to play. I've found that it works better with a gamba underhand grip than with a cello overhand grip, but that might just be me. I find that mostly because the shorter body of the viol (compared to a cello) makes the overhand grip a little awkwardly placed (I get jammed up in the shoulder). But the sound is good either way.
Video sample of the instrument being played. I'm not a gamba player, so my technique is not perfect, but it gives some idea of what it sounds like.
OTHER RECONSTRUCTIONS
Bernard Ellis's Recreation
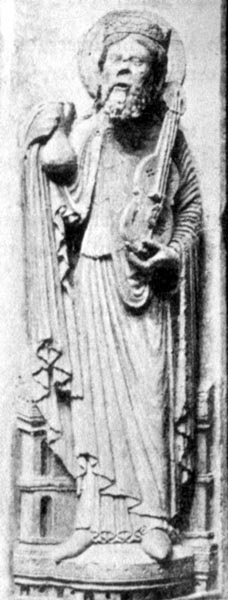
Based on the Oakham Castle sculpture in England.
Block carved body, attached neck. Has fingerboard, tailpiece and bridge. Four D soundholes, two each in upper and lower bouts. Three strings. Bridge is low and flat.
Overall length is 94cm (37")
Width at widest bout is 54.8cm (21.5")??
String length is 62cm (24.4")
Christopher Allworth's Recreation
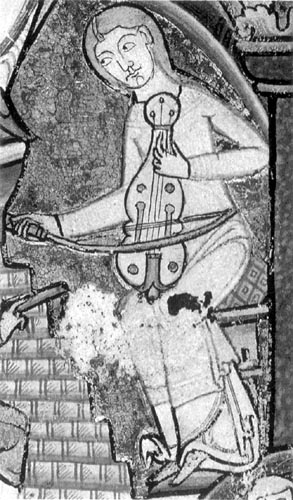
Based on the 12th Cent. York Psalter (King David portrait) presently at Univ. of Glasgow, MS U.2.3.
Body assembled (not block carved), attached neck. Has fingerboard, tailpiece and bridge. Two double-keyhole soundholes. Three strings, low flat bridge.
Overall length is 83cm (32.7")
Main body is 53cm (20.9") long, 27cm (10 5/8") wide
Body depth is 8.2cm (3 1/4")
Marco Salerno's Recreations:
Does three -
1. Based on 12th Cent. York Psalter (King David Portrait)
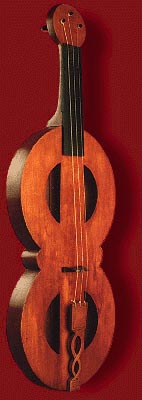
Body assembled, attached neck. Fingerboard (with gut frets), tailpiece, and high arched bridge. Soundboard also arched. Two double-keyhole soundholes, four decorative inlays. Five strings.
Overall length - guessed at about 80cm (31.5")
String sounding length (bridge to nut) 53cm (20.9").
Very deep body (about 10cm or so)
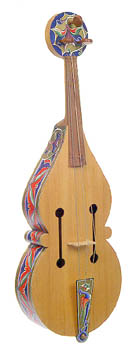
2. Based on 12th Cent. German Bible (which actually is one known to show a bridge)
Body assembled, attached neck. Fingerboard (with gut frets), tailpiece, and high arched bridge. Soundboard arched. Two closed c soundholes, five strings.
Overall length - guessed at about 94cm (37")
String sounding length (bridge to nut) 60cm (23 5/8")
Also deep body (about 10cm or so)
3. unknown source, though probably the same as above. Dimensions and shape similar to number 2. Soundholes smaller, with four small inlays as well at corners of soundboard.
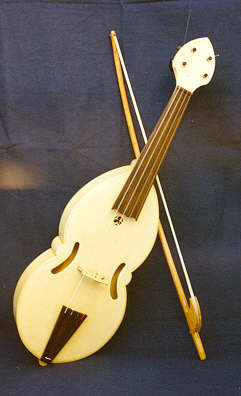
Jesus Reolid's Recreation
Probably based on the Great Canterbury Psalter, c. 1180-90, Bibliotheque Nationale, Paris, but don't know for sure. Cannot get measurements or other specifics from the image on his website. Four strings, flat soundbard, attached fingerboard, bridge, endnut and tailpiece. There is a cute rosette just below the end of the fingerboard on the soundboard.
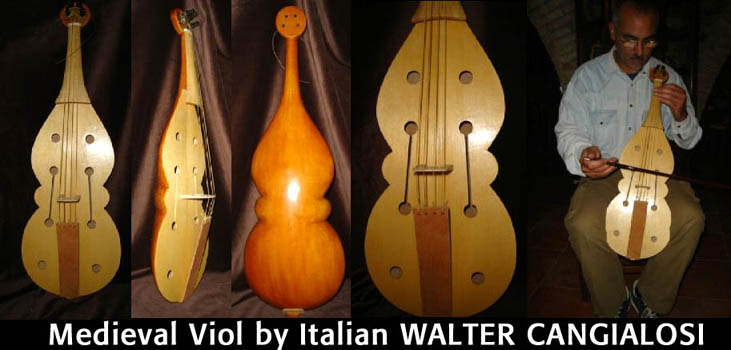
Walter Cangialosi's Recreation
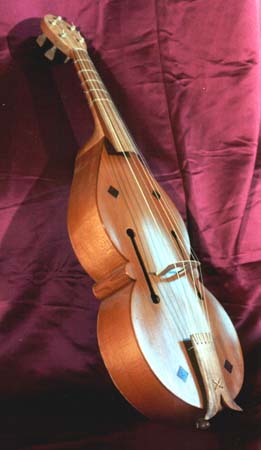
Based on the 12th Cent. York Psalter (King David portrait) presently at Univ. of Glasgow, MS U.2.3.
Very nice copy, block carved with interesting approach to the body, making it shallow and rounded (there is some evidence that fiddles were shaped this way in general, though the sculptural evidence for this type of fiddle I think suggests a more square shape). I'd be particularly curious to hear how that shape makes the instrument sound (my guess would be a really interesting raspy/nasal tone). Uses attached fingerboard and a high curved bridge.

Reconstruction by ?
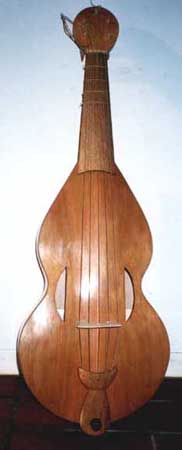
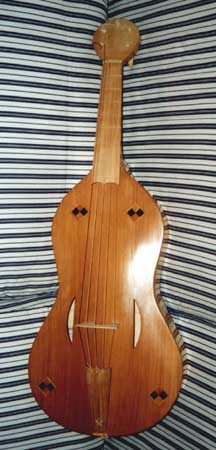
Based on the 12th Cent. York Psalter (King David portrait) presently at Univ. of Glasgow, MS U.2.3.
Frustratingly, I cannot find my notes as to who made this copy. What I'd consider the most accurate copy I've seen so far. Block carved, with flat front and relatively deep body, no discernable fingerboard, and low flat bridge. Not quite sure how the tailpiece is attached, but it does have a very accurate appearance. The bridge on this instrument is so low that it would be impossible to play single strings - the only option would be to play all at once.